Intune and Power BI Deep Dive - Part 2 - Application Registration
Continuing from Part 1, our next step is to establish an application registration in Azure. This registration will enable us to utilise its permissions for accessing data on the Microsoft Graph and hopefully then, importing that data into Power BI. This setup is essential as it serves as a global prerequisite for accomplishing our ultimate objective.
Quick Links
Creating the App Reg
This is going to be a ‘whistle stop tour’ of setting up an application registration. Consider this a condensed guide that will provide you with the necessary steps. As you progress and develop your Power BI data sets, you can always revisit specific parts of this process to add additional permissions, granting you access to more data. It’s a flexible approach that allows you to expand your data resources as needed.
- In the Azure Portal, search for Application Registrations
- Once opened opt to create a New registration

- (1) Give it a name.
(2) Accept the default options for the rest of the properties.
(3) Select to Register the app.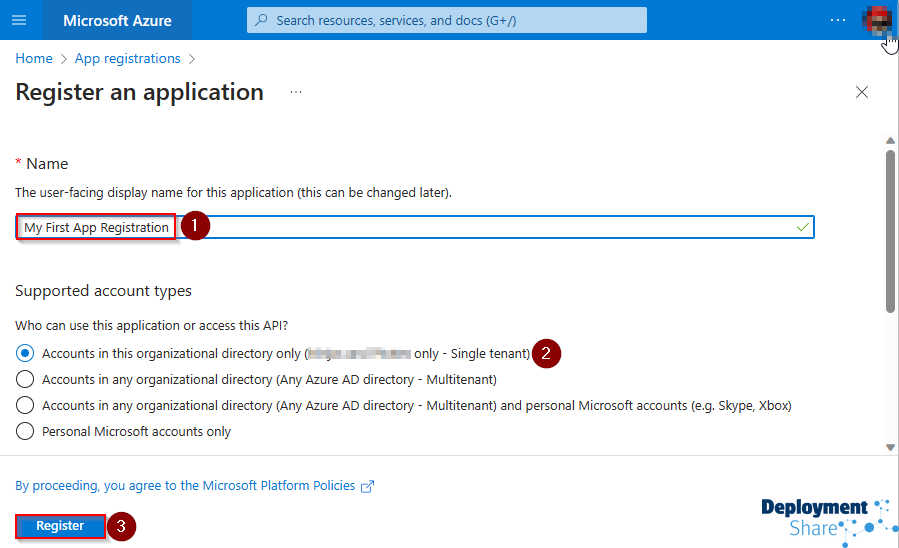
- Once the Application Registration is complete, on the Overview tab,
(1) Record the TenantID.
(2) Record the Application (Client) ID.
… you will need these later.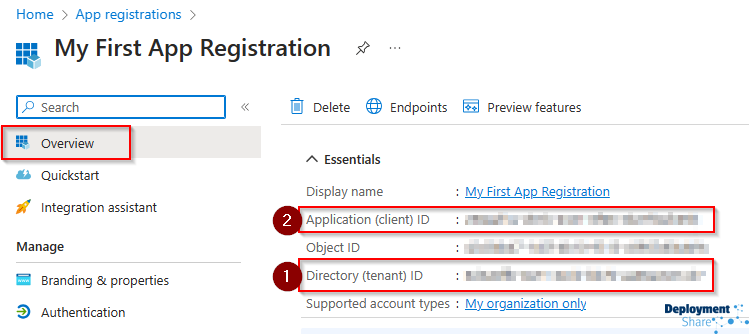
- Now lets go ahead and create a secret, go ahead and select Certificates & secrets
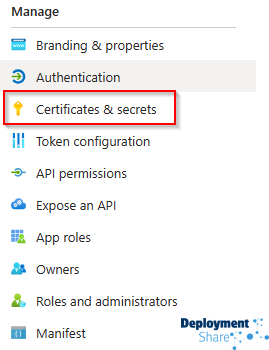
- Once there click on New Client Secret

- Give it a name and chose a length of validity.

- Once its create, you will need to take note of the Value which is the credential you will need to use to authenticate. You will need this along with the TenantID and AppID collected in step 4.

- Next you will need to add some permissions to the app reg so it is allowed to access some data. To do this click on API Permission on the left hand side
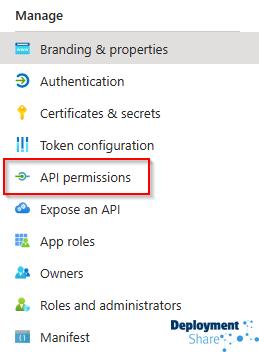
- You are adding Microsoft Graph Permissions

- And the type of permission you are adding is Application Permissions

- From the options pane you can either
(1) Type the permission in the top or
(2) Browse down the side to pick a permission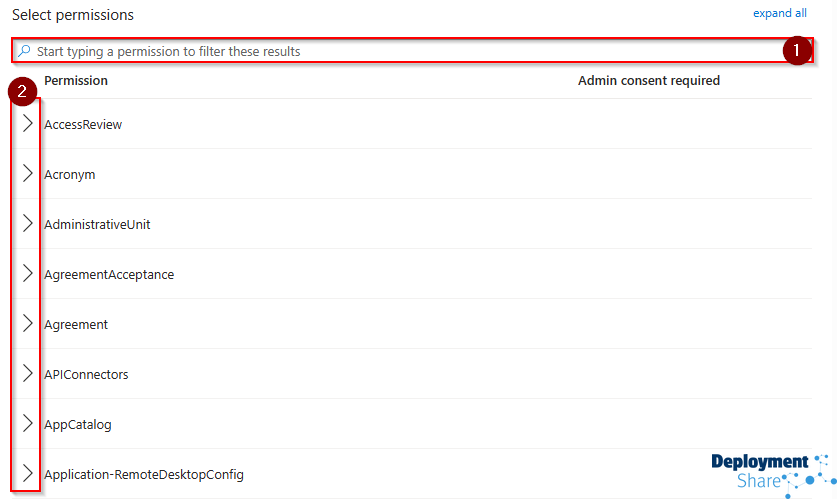
- When you have chosen a permission, you will notice this orage warning symbol that states that the permssion is not yet granted for your tenant

- Thereafter you will need someone with GA permissions to Grant admin consent
(1) Granting Consent
(2) You will then notice the Orange warning has turned to a nice green tick
Tip
I would suggest adding the following as a baseline (notice how they are all Read.All and not ReadWrite.All
DeviceManagementManagedDevices.Read.All
DeviceManagementApps.Read.All
DeviceManagementServiceConfig.Read.All
DeviceManagementConfiguration.Read.All
Here you can see where the permissions are called out on the Graph documentation, as an example
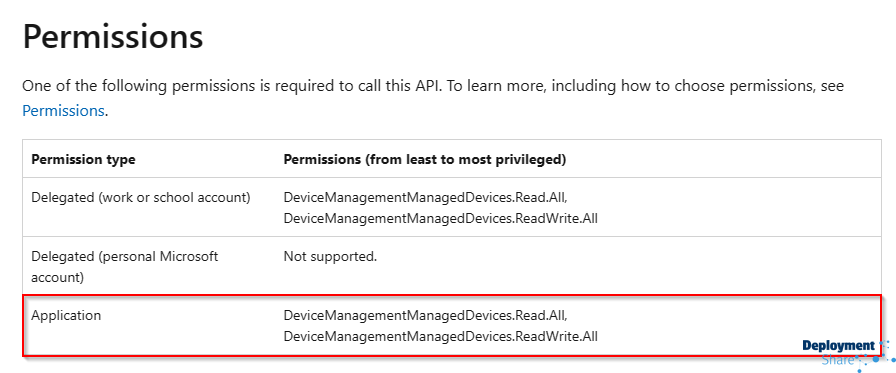
You can type that permission name in to the search box highlighted with a (1) on step 12 above.
In the next post I’m going to look at using Graph Explorer and Postman to test the API calls you need to make and to take a look at the results. Once you have a good understanding of the format and how to use the tools to speed things up, getting the data into Power BI would be the penultimate stage right before dashboard creation abd this will build momentum with practice. Continue on in the series with me into Part 3 where I go into details about what to do next!.
I appreciate you taking the time to read my blog.Your interest and support keep me motivated to create more content.
If you think others might benefit from this content, please consider sharing it
... Jonathan
Links and References
| Location | Link |
|---|---|
| Microsoft Learn | Quickstart: Register an application with the Microsoft identity platform |
| Microsoft Learn | Implement app registration |
