PowerShell App Deployment Toolkit Write Up
Hi all, thought I’d write up what I’ve been working on recently, which is re-visiting PowerShell App Deployment Toolkit. A great Resource for ConfigMgr apps, but equally it is supported in Intune so I will be doing a follow-up post on using this with Intune. I know there are plenty of blogs out there on this so this is just my interpretation and is intended to get people started. I know, for example, that the kit comes with a wide variety cmdlets that you can utilise to achieve tasks but this write up is based around getting those a little familiar with PowerShell up to speed with it. There are many ways to skin a cat.
Prep Work
- Download the latest toolkit from here: https://psappdeploytoolkit.com/
- Extract the .ZIP folder and call this folder “PSADT – FULL”
- Go into the folder, into the Toolkit folder and create a folder called “Files” (if it doesn’t exist already)
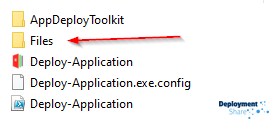
- This is where we’re going to store our source files for the applications we’re going to deploy.
- From within the FULL folder, copy the Toolkit folder out to the foot and call this “PSADT – TOOLKIT MASTER”

TOOLKIT MASTER should only contain the following items
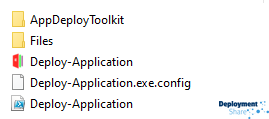
Now you have a copy of the full kit that’s not been touched and a copy of the toolkit you can begin to customise for your customer(s).
- Working with the TOOLKIT MASTER folder, Open up “Deploy-Application.ps1 and edit the following…
Comment out the “Show-InstallationWelcome” and Show-InstallationProgress
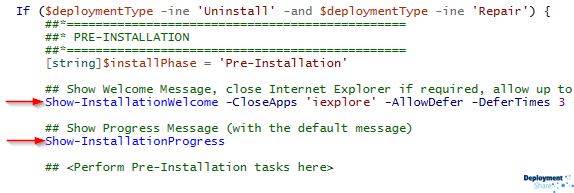
- Do the same for Pre-Uninstallation, comment them out…

- Under Post-Installation, comment out the line highlighted below

- The above actions make it more silent so the user isn’t bothered when installation takes place. These are options you may wish to reinstate later, the choice is up to you I’ll let you do your own research on that, but for now we’re aiming for not bothering the end user.
- Save the script.
- Next, within the AppDeployToolkit folder, open up the AppDeployToolkit.xml file and change the following
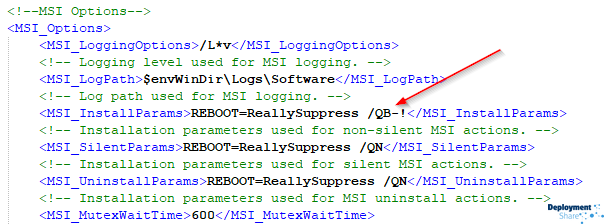
Under MSI Options edit the install params to be /QN instead of /QB-!
Branding
- You will need to brand the toolkit to your specific customer, otherwise it will be using the standard branding.
- From within the TOOLKIT MASTER, open up the “AppDeployToolkit” folder and replace the “AppDeployToolkitBanner.png” with a branded one (must be the same name!)
- Next, replace the Icon file (same folder) with a branded Icon file, again with the exact same name. To do this, create an image 256×256 pixels in size, then open the image using Greenshot and this will give you and option to save the image as a .ICO file
You are now ready to use this toolkit in a silent manner for your ConfigMgr or Intune applications
Process
- For each app you will need a COPY of the TOOLKIT MASTER folder, so lets start by creating one

- Next you will need to download your content files (source files) and place them in the ‘Files’ Directory.
- Now we can start editing the script to match the criteria of the application we’re trying to deploy.
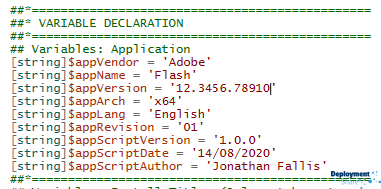
- First, open up the DeployApplication.ps1 and scroll down to the “Variable Declaration” section where we’re going to populate all the details of the application we’re going to deploy. Lets fill this out, here is an example
- Now we’re ready to do the app work!
- You don’t need to worry about having in depth PowerShell (although some helps) with this script you simply only need to remember a few things. Firstly, there are three phases of installation in the script
- Pre-Installation – where you would place any code you want to execute BEFORE the app installs
- Installation – the app install itself
- Post Installation – where you would place any post actions such as copying files or registry entries or even clean up activities.
- I’m going to break these down in to a .EXE and a .MSI installation for you.
MSI Example
Read through the examples carefully and take in and fully understand the ‘Take Away’ section which is where I’ve highlighted what you should have learned. Scenario: Lets say that you have to install Flash Player (THE HORROR!), but before you do you have to create a folder called “C:\Flash” which is what the company you’re working for want to use to store all their website flash content in. Strange, I know, but lets roll with it. So we have two things we need to achieve;
- we need to install the program
- we need to create the folder.
The folder creation, it doesn’t matter in this particular case whether we do it before or after the installation so we can place that in either “Pre-Installation” or “Post-Installation” step, I’m going to chose Post-Installation in this case.
- As with traditional applications, MSI installs are pretty easy to do. The script has its own cmdlet to handle this called Execute-MSI (see the top tips section at the end!)
- So, firstly we would take a copy of the TOOLKIT MASTER folder and Rename it to “Adobe Flash”

- We would then open up the DeployApplication.ps1 and edit the Variable Declaration as stated above in the Process Section to match Adobe Flash and the version number etc.

- Next we would locate the “Installation section” and add in our installation line:

I’ve blurred out the rest to draw your eyes to the correct section…. Notice the format of the string, it reads pretty straight forward, no more calling MSIEXEC.exe, dont worry about the format of the code as that will be explained later (see the top tips at the end!)
You can see here from the help for this cmdlet that the cmdlet called, Execute-MSI, expects the files to be in the “Files Directory” (highlighted in Blue). This is why we sense checked the folder earlier.

- Next we create the folder “C:\Flash” as per the requirements. In the post-installation section, simple add your code…

Again, I’ve blurred out the surrounding code to draw your attention to the section to use, you’ll start to pick up they follow the same format
There is a cmdlet you can use for this that build into the PSADT module, I’ll let you explore that! However this achieves the same thing
- Let populate the uninstall section so that we can uninstall the app using the script too…

Notice that the ‘action’ switch has changed in this case.
And that’s it, done. Save the script. You can test this before on a test box (which I suggest you do). When creating your ConfigMgr application, the command to install the application would be to call the DeployApplication.ps1 with a switch of -DeploymentType Install, like so…
- Deploy-Application.ps1 -DeploymentType Install The uninstall command would be
- Deploy-Applicaiton.ps1 -DeploymentType Uninstall
Take Away
- Understand the structure of Pre, Post, and Install and what tasks need to be done when, given your requirements.
- Know that under the <\Perform Tasks Here> sections, you can have as much code as you need, doing whatever tasks you want.
- Understand the cmdlet written for installing MSIs. You use Execute-MSI with a Install switch
- If you wanted to uninstall items before installing the new version, you could use “Start-Process” and call the uninstall with a -wait switch like so…
- Start-Process -FilePath “C:\Windows\system32\msiexec.exe” -ArgumentList “/x{26923b43-4d38-484f-9b9e-de460746276c} /qn” -wait
- This would;
- Call msiexec that exists on all windows based machines
- Pass the argument list of uninstall, quietly with no UI.
- Wait until its finished before it does the next line of code, so if you had multiple install
.EXE Example
Scenario: Lets say that you have to install Flash Player (THE HORROR! AGAIN!!!), but before you do you have to create Registry Key “HKLM:\Software\Company\Adobe\Flash” with a string key in there called “Status” that has a setting of “Awesome” and an Integer key (DWORD) called “ReallyAwesome” with a setting of “00000001” which is what the company want, because they’re weird.
The string key must be created BEFORE the application is installed and the Integer key must be created AFTER the software is installed.
We know that the .exe accepts the switch /quiet for the install and also /uninstall /quiet for the uninstall, which we’ve gotten from normal testing. We need to..
- Create the String Regkey (before install)
- Install the program
- Create the Integer Regkey (after Install)
- Set the uninstall up
- So lets create the first regkey, inside Pre-Installation

- Next we need to install the application

- Notice the difference here, we’re not using Execute-MSI this time.
- Starting a process
- Passing the arguments
- Adding -wait so it waits for the install to finish
- There are many ways to call .exe’s from PowerShell, doesn’t really matter what you use.
-
Next we add the regkey we need to add AFTER the installation.

Remember we set the path earlier on, in the Pre-Installation section so the variable $RegistryPath, is already there. -
And finally the uninstall section needs populating

Hopefully this is beginning to make sense now….
Take Away
- Cement our understand the structure of Pre, Post, and Install section and what tasks need to be done when, given your requirements.
- Know that under the
sections, you can have as much code as you need, doing whatever tasks you want. - Calling executables is different as we cant leverage the Execute-MSI cmdlet, so we use Start-Process with a -wait on the end
Top Tips
Within the folder structure of your PSADT, there is a sub folder called “AppDeployToolkit”
And in there you will find a script called AppDeployToolkitHelp.ps1
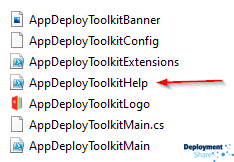
If you run this script you will launch the help section where you will have detailed instructions on the cmdlets available inside PSADT and how to use them.
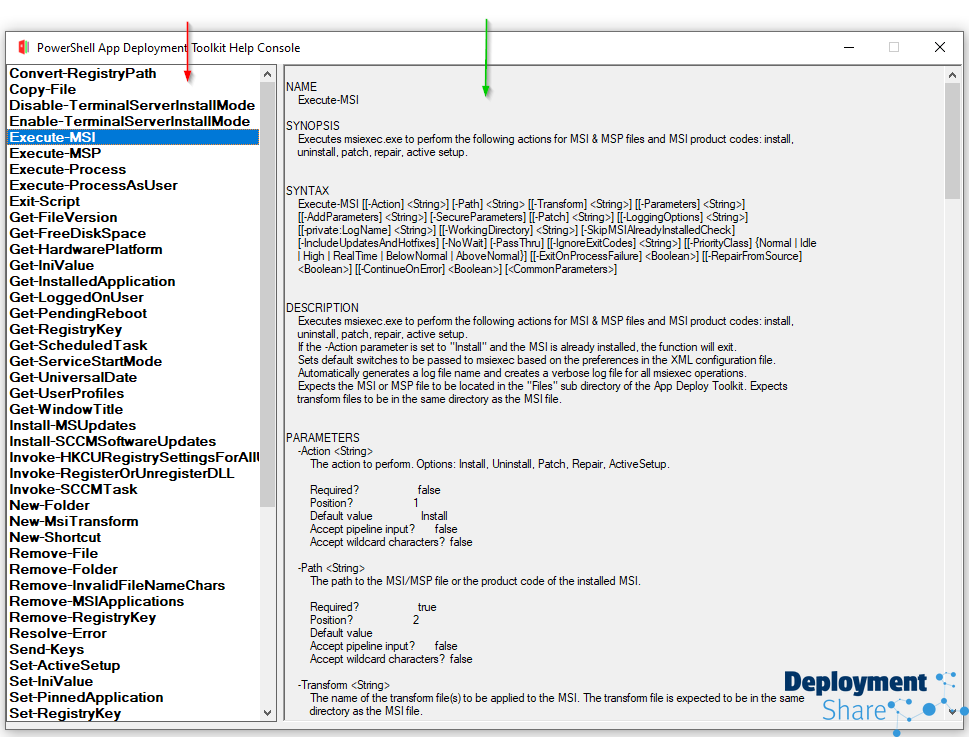
The section highlighted with a red arrow is the name of the cmdlets you can use, and the green arrow points to the format of the code to use with some examples at the bottom.
You will find almost everything you need in here to fit most of the requirements for app packaging. There are also plenty of tutorials you can access on YouTube to gain further understanding of this but it is very powerful indeed.
Some of the items we commented out in at the beginning to make the user experience more silent, can be switched back on if you wish, we can make it as visual or silent as you wish, the more you use this tool the more you will realise its potential & scalability. It is supported in ConfigMgr and Intune (win32) Applications, but it does not negate the need for proper testing in the normal manner via VM’s and information gathering.
Thanks for reading
Jonathan.
